Multimedia collaboration with The Eyeo Festival and Northern Spark
The Pitch
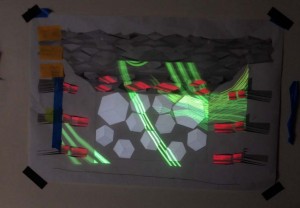
On May 22nd, 2014 I received an email from Yael Braha (Creative Director) with the words “2D/3D Artists & Projection Mapping Artist Needed (URGENT!)” in the subject field. The rest of the email revealed that she was being commissioned to create an audio-reactive live visualization for the Minnesota Orchestra during The Northern Spark and Eyeo Festivals starting on June 14th. Once I took a peek at the attached images of the stage, I was immediately sold.
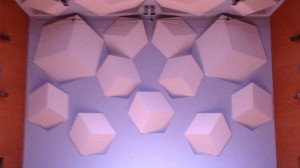
- This is the stage in the Orchestra Hall in Minneapolis Minnesota.
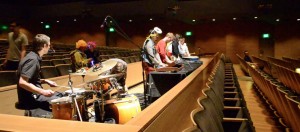
We would be creating one visual set designed specifically for the Minnesota Orchestra’s performance on Friday and Saturday, and one visual set for the electronic musician and performer Dosh after the orchestra on Saturday. On both Friday and Saturday after the Minnesota Orchestra’s performance there would be a kiosk set up with eight different instruments so that any member of the audience could play the instruments and watch the projection mapped visual animations react in real time.
The event would be held at the Orchestra Hall in Minneapolis Minnesota , and we would be working with two 1920×1080 20K lumen Projectors and eight different audio inputs into a Behringer Firepower FCA1616 8 channel audio mixer for audio reactivity. Resolume was the choice for our media server, and we needed to use that in conjunction with Mad Mapper in order to map the complex geometry of the stage. We wanted to have the absolute clearest and brightest image possible, so we were to use the two projectors directly on top of each other. Both projectors had to be from the same distance, so we decided that we would use one projector zoomed in as far as it would go while still encompassing the entire center of the stage, and the other would stretch as wide is it could go without bleeding into the audience. The projector that is to be focused tightly on the center will have it’s lumens and pixels more concentrated.
Developing the template
We only had two and a half weeks to come up with a full production, so we began working immediately. Luckily we had help creating enough content, but first we needed to create a digital 3D model of the stage in Cinema 4D that would become the 3D template with locked camera positions. This way we were able to share the 3D template with each animator and ensure that each animation would have exactly the same perspective.
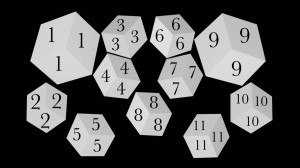
Half of our animators were more comfortable working in 2D and Quartz Composer and the other half in 3D. We knew any 2D content would either appear completely flat when mapped on the stage or it would become badly distorted if we tried to fake the perspective by warping the 2D images on the actual stage. Each cube had three visible faces, so if we attempted to create a third plane from a 2D image the animations would not line up right on the edges of each cube face. We wanted to make use of this opportunity to projection map a stage with this geometry so using only straight 2D content was unacceptable. To fix this we took the animations rendered by our 2D animators and used them as flat camera mapped textures in our Cinema 4D template. This way we could still give the illusion of 3D perspective in our 2D animations by positioning lights in the 3D space and playing with shadows.
Compensating for perspective
We only had a photo taken from a cell phone camera, but at least it was from audience’s perspective. We had no idea of the actual dimensions of the stage. If we could have afforded to fly out to Minneapolis early we would have taken a better photograph and calculated the warping of perspective from the camera lens to the projector lens, and from the projector’s perspective to the audience’s perspective. At this point I was not familiar with the software TouchDesigner or I would have certainly used it. Since we wouldn’t have time on site in Minneapolis and we needed to start creating animations immediately, we decided we would have to use that one cell phone photo. This presented us with a couple of minor hurdles. We could try to match the model to the audience’s perspective to the best of our ability, but there were too many factors involved with our limitations. There was no way we were going to be able to use Resolume’s mesh warp feature to warp our unavoidable errors of perspective into shape. This method only works with very simple geometry and much more simple geometry than we were working with. Thankfully there is a wonderful piece of mapping software called MadMapper.
Benefits of MadMapper
With Mad Mapper we would be able to cut out each face of the cubes with no overlap and then map them individually on the physical stage. We originally wanted to use one output of 1920 x 1080 from Resolume, but after discovering that we absolutely needed to use MadMapper it was necessary to separate the background from the cubes in Resolume making them two entirely different animations that would need to be cued from different layers at the same time. We had to increase the resolution of the output in Resolume to do this, and then the Macbook Pro couldn’t handle it. We had to downsize each animation from 1920 x 1080 to 1280 x 720. At this point using the HDMI output and the Thunderbolt output simultaneously was still too much work on the onboard graphics card, but when we used the Matrox Triple Head2Go every thing began to run smoothly. Our final solution allowed us to use five layers in Resolume. We used two layers positioned on top of each other for the cubes and two layers on top of each other for the background, so we would have the ability to mix between them. Then we made one layer just for the animations that would be mapped onto the balconies on the sides of the stage.
Back to the Template
We passed off a rough Cinema 4D model with the cell phone photo as a camera mapped background image to Tim Shetz for him to work his 3D magic and create a template that would make it easier for our animators to render from two different cameras without messing up the perspective. Tim wrote a script for the Cinema 4D template that made this incredibly easy for our animators. This was also necessary so that our animations could have the same perspective and so that objects could move from the faces of the cubes and onto the background seamlessly, regardless that one of the projectors would have a much wider image. These two separate animations would need to be triggered at the same time from two different layers in Resolume, but we would take care of that in the MIDI Mapping.
Open Sound Control
Now that we had all of the mapping and animating figured out, we had to start thinking about how we were going to get eight different audio feeds into Resolume. For that we went to Chris O’Dowd to help us out. He wrote a Max MSP patch that would take any audio from a mixer and convert it to OSC (Open Sound Control). We used a separate MacBook Pro(2) to take in data from the eight channel mixer and to run Chris’s patch. I ran OSCulator to send the OSC messages over Wifi from that computer(2) to the other one that was running Resolume. I also used OSCulator on the Macbook running Resolume to then convert the OSC signals into MIDI signals to get a more dramatic audio reaction from Resolume. A special thanks to Matthew Jones for all of the advice.
TEAM: Creative Director: Yael Braha, San Francisco,CA // Technical Director and 3D Artist: Matthew Childers, San Francisco,CA // Cinematography: Michael Braha, Rome,Italy // AV Programming: Jim Warrier, Berlin,Germany // Audio Programming: Chris O’Dowd, San Francisco,CA // 2D/3D artists: Tim Shetz, Matthew Childers, Yael Braha, Jennifer McNeal, San Francisco,CA
